A Blog is a strange way to tell a story.
If you start here, at the top, and read down, the story comes in jerking flash backs, beginning near the end, going forward then jumping back before the place you began, then running forward and jumping back further again to the beginning.
If you go to the bottom and read up, it makes sense at first. The first short post fits nicely on the screen, then scroll up to the second post, then the posts get bigger and you're scrolling up and down and you see the pictures in the wrong order and get distracted by a link that you should have already seen and...
...or you could come in somewhere in the middle, probably because you asked google what there was on the internet about "dingle gearing", and read random posts till you get bored or need to do something else.
But if you followed each post in turn from the beginning, you would read the story of my emergence from early parenthood, to re-discover the joy of cycling when my wife bought me a design-your-own multicoloured single speed bike off the internet. And then the story of its transformation into a custom 2 speed racer, with a fast down hill and flat land gear, and a lower gear for the climb back home. 2 single speeds in one, with gears changed by loosening the rear wheel and moving the chain manually between cogs.
So I rode like that for a while. 52T front cog / 16T rear freewheel for the down hill, then change to 48/18 for the climb home. And I got fitter, and stronger, and after a while I could get back home in the high gear. In fact I could go most of the places I wanted to go in the high gear, even on a longer loop across the river and around to the university, with the final climb over the bridge and up to the top of Highgate Hill with my legs burning and chest heaving. At least it got to a point that, if I needed a lower gear, 52/18 was enough of a step down, and I took the 48T chain ring off. I experimented for a while with 170mm cranks, but I felt like I could spin the 160s faster so I went back to them.
And for a while that was the set up for the Dornoch Dingle. Big green frame with track forks, 52T chain ring on 160mm cranks, 16/18, 2 speed freewheel on the back, aero rims with skinny red tyres, a slight rise to straight handle bars with small bar ends, and a hard, narrow, white saddle.
Then winter came and I got the flu. I started riding more on the 18T than the 16T sprocket. Then I got sick again, that tends to happen when you have small kids, and I let the dingle hang in the garage for a while.... and a bit longer... and then, when I was starting to feel better, but not up to full strength yet, and looking for something to do... I built another bike.
Which I'll tell you about before this.
Sunday, 23 September 2012
Tuesday, 17 July 2012
Truing and bearing the cones-equences
I rode around on my new front wheel for a while. Then one day I was sitting in my office at work, when I noticed that one of my spokes was loose enough to rattle with my fingers.
I know enough to know that's not good. So I thought I'd better do something about it. That meant buying a spoke wrench... and while I as at it I though I might get some cone wrenches as well.

I tightened up the loose spoke, but then I was in dangerous territory. Now I had the tools to do some proper damage. Truing wheels and adjusting wheel bearings seemed like serious bicycle mechanicery. Sheldon calls truing the "trickiest" job in bicycle maintenance, "a person who tries to 'touch up' a slightly out-of true wheel without proper knowledge could turn an imperfection into a disaster".
I talked to my hardcore Canadian cycling buddy about it. She agreed it was a tricky business. She told me about her ex boyfriend who spent hours doing cones and tweaking his spokes (she mimed him inhaling thoughtfully and stroking his chin). But when she tried it, she thought she'd done a good job, only to have her wheel EXPLODE when she bumped down off a gutter!
There are a few points to ponder in that story:
- hardcore cycling buddys can be girls.
- "cones" may have more that one meaning, but more about hub adjustments in a moment.
- why no nipple jokes?
- why would a badly trued wheel EXPLODE!?
There are four things you can adjust with a spoke wrench, vertical true, lateral true, dishing and spoke tension. To make things complicated, every adjustment you make with the wrench changes all four at once. So truing has to be a process of many slight adjustments and readjustments, with much careful reflection and deep consideration of each move ... just the sort of thing that people who fiddle with bicycles love. With a mug of tea for me!
Sheldon Brown says the best way to learn truing is to start by building wheels from scratch, better than trying to repair dented and damaged rims, but I've started by just making small adjustments to some new wheels that have loosened up a bit after they've first been ridden. I have no truing stand, so I put the wheel on the upside down bike, with the tyre and tube off. I use the brake pads to check lateral true and hold a straight edge against the frame to check vertical true. I haven't really worried too much about dishing with the small adjustments I'm making. Perhaps I'll need to get a dishing stick next. Sheldon gives highly detailed instructions of what to do. Just remember the saying "better is the enemy of good", which I hear from an orthopedic surgeon, and know when to stop.

I suspect my friend's EXPLODING wheel was due to a problem with spoke tension. There is such a thing as a tensiometer which measures spoke tension, but I've just tuned them all to around F# above middle C (John Allen has a nice table of spoke lengths, and musical pitches for butted and unbutted spokes).
After that, servicing and adjusting cone and cup hubs was easy. Apart from the worry of dropping ball bearings all over the floor, it essentially involves tightening small nuts against each other on a treaded axel with some funky little skinny wrenches. With small adjustments I tighten the cones just enough to eliminate any play from side to side. Sheldon says most bicycle hubs are adjusted too tight. Quick release clamps compress the axel and tighten the bearing a tiny bit so you can leave a tiny bit of play and check that it is gone when the wheel is on the bike.


No. But I have gotten a little addicted to fiddling with my wheels. It's great to pick up your bike, give the wheel a flick and watch it spin 4 EVA. But with the cones adjusted so finely, I have to keep checking that they haven't loosened off and started rattling. I now realise that the hours I spent as a youth adjusting the cantilever brakes on my hard ridden mountain bike, would have been better used carefully straightening out my lumpy rims. And I've found that riding along looking down at a freshly trued, radially spoked, front wheel, rotating but almost looking like it's not moving, is quite mesmerising. I have to remind myself to look up.... another way to end up in on-comming traffic.
Sheldon Brown says the best way to learn truing is to start by building wheels from scratch, better than trying to repair dented and damaged rims, but I've started by just making small adjustments to some new wheels that have loosened up a bit after they've first been ridden. I have no truing stand, so I put the wheel on the upside down bike, with the tyre and tube off. I use the brake pads to check lateral true and hold a straight edge against the frame to check vertical true. I haven't really worried too much about dishing with the small adjustments I'm making. Perhaps I'll need to get a dishing stick next. Sheldon gives highly detailed instructions of what to do. Just remember the saying "better is the enemy of good", which I hear from an orthopedic surgeon, and know when to stop.

I suspect my friend's EXPLODING wheel was due to a problem with spoke tension. There is such a thing as a tensiometer which measures spoke tension, but I've just tuned them all to around F# above middle C (John Allen has a nice table of spoke lengths, and musical pitches for butted and unbutted spokes).
After that, servicing and adjusting cone and cup hubs was easy. Apart from the worry of dropping ball bearings all over the floor, it essentially involves tightening small nuts against each other on a treaded axel with some funky little skinny wrenches. With small adjustments I tighten the cones just enough to eliminate any play from side to side. Sheldon says most bicycle hubs are adjusted too tight. Quick release clamps compress the axel and tighten the bearing a tiny bit so you can leave a tiny bit of play and check that it is gone when the wheel is on the bike.


So I trued and adjusted my wheels. What was the worst that could happen? Catastrophic failure at high speed, throwing me into on-coming traffic, a severe head injury and the rest of my life in a coma?
No. But I have gotten a little addicted to fiddling with my wheels. It's great to pick up your bike, give the wheel a flick and watch it spin 4 EVA. But with the cones adjusted so finely, I have to keep checking that they haven't loosened off and started rattling. I now realise that the hours I spent as a youth adjusting the cantilever brakes on my hard ridden mountain bike, would have been better used carefully straightening out my lumpy rims. And I've found that riding along looking down at a freshly trued, radially spoked, front wheel, rotating but almost looking like it's not moving, is quite mesmerising. I have to remind myself to look up.... another way to end up in on-comming traffic.
Saturday, 5 May 2012
Wheels
The bloke who did our kitchen was impressed by my wheels. The 45mm deep aluminium aero rims, he said, would definitely make me go faster. And he probably knows what he's talking about, he rode for Rhodesia at the 1980 Moscow Olympics, and his daughter was the Australian elite female road cyclist for 2011. (Hot tip for this year's London Olympics... go Shara!)
He was impressed and a bit surprised to see those wheels on a $500 bike. It's something to do with the weird economics surrounding the rise of China, I'm sure.


This full carbon road bike could cost you under $700 or over $6000 online, depending on where you buy it! Is it really the same bike?
The wheels that came with my jelly bean bike are more about show than go though, I'm sure. The rims come in a choice of 8 different colours. The hubs only come in one... gold! They're showy but also strong, no doubt. Except I broke one!
Slowly riding out from work, I was watching the pedestrians and not where my wheels were going. Perhaps in my subconscious I was still on a fat tyred mountain bike and had forgotten the 700x25 rubber that was really underneath me. I dropped the front wheel into a storm water grate, came to a sudden stop and fell a bit to the left. There was a loud crack and I was left looking for another way to get home.
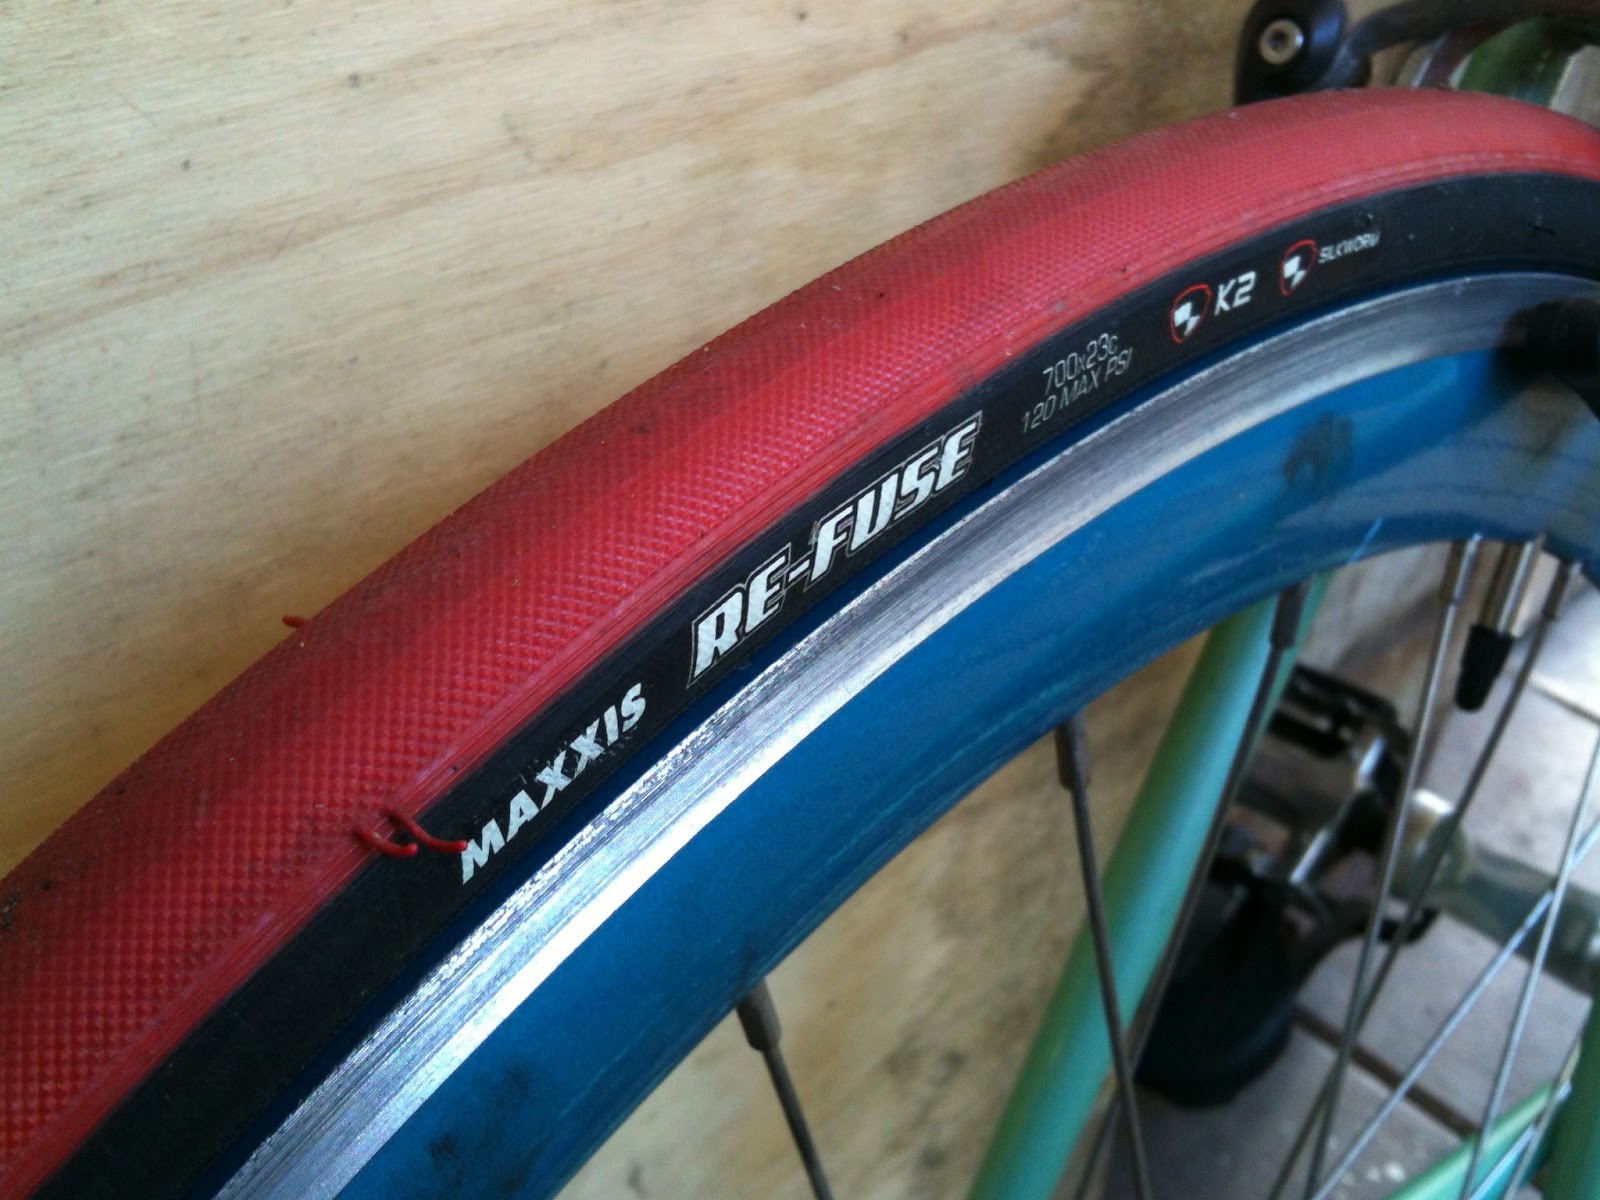
Wheels do take a beating. First I had pinch flats which I fixed with some hefty cloth rim tape.

Then I tore a hole in a tyre riding over an expansion joint on the Victoria Bridge.

So I got these with kevlar in them.

And they're red.
But there was no way to repair the buckled aero rim.

So new rim? New wheel? Could I get something that matched for less than the cost of a whole new bike?
On the jellybean bikes web site you can easily order a custom coloured complete bike delivered anywhere in Australia. But it's not really set up to order replacement parts. It took a couple of emails, a phone call and a couple of weeks to organise, but they could sell me a new front wheel complete with tyre and tube for $75 + postage. When it arrived it came with an extra tube and tyre! But the hub was silver not gold!?
I'm not complaining. I was back on the road with my deep rims and my flash hubs for less than I paid for my White Industries freewheel.... So here are a couple of pictures of it.


While I was waiting for my new wheel, I looked around at what alternatives where available and was very tempted by these...

My wife tells me they would clash with the flouro green frame though. Maybe I need a whole new bike?
He was impressed and a bit surprised to see those wheels on a $500 bike. It's something to do with the weird economics surrounding the rise of China, I'm sure.


This full carbon road bike could cost you under $700 or over $6000 online, depending on where you buy it! Is it really the same bike?
The wheels that came with my jelly bean bike are more about show than go though, I'm sure. The rims come in a choice of 8 different colours. The hubs only come in one... gold! They're showy but also strong, no doubt. Except I broke one!
Slowly riding out from work, I was watching the pedestrians and not where my wheels were going. Perhaps in my subconscious I was still on a fat tyred mountain bike and had forgotten the 700x25 rubber that was really underneath me. I dropped the front wheel into a storm water grate, came to a sudden stop and fell a bit to the left. There was a loud crack and I was left looking for another way to get home.
Wheels do take a beating. First I had pinch flats which I fixed with some hefty cloth rim tape.

Then I tore a hole in a tyre riding over an expansion joint on the Victoria Bridge.

So I got these with kevlar in them.
And they're red.
But there was no way to repair the buckled aero rim.

So new rim? New wheel? Could I get something that matched for less than the cost of a whole new bike?
On the jellybean bikes web site you can easily order a custom coloured complete bike delivered anywhere in Australia. But it's not really set up to order replacement parts. It took a couple of emails, a phone call and a couple of weeks to organise, but they could sell me a new front wheel complete with tyre and tube for $75 + postage. When it arrived it came with an extra tube and tyre! But the hub was silver not gold!?
I'm not complaining. I was back on the road with my deep rims and my flash hubs for less than I paid for my White Industries freewheel.... So here are a couple of pictures of it.


While I was waiting for my new wheel, I looked around at what alternatives where available and was very tempted by these...

My wife tells me they would clash with the flouro green frame though. Maybe I need a whole new bike?
Wednesday, 29 February 2012
Dingle gearing
You might think that bicycle gearing would be a simple thing. There are only four variables: rear wheel size, rear cog size, front cog size and crank length. Surely Sheldon Brown has the answer. But then the rider comes into the picture... Consider this.
How many gears does a single speed bicycle have? I say at least two. Sitting and standing.
There is also a difference between Spinning - evenly applying force through the whole pedal cycle, usually with a fast cadence, and Honking - pushing hard on the down stroke and letting your foot come back around with the pedal, usually at a slower cadence.
If you want to think in terms of energetics, how much power is needed to move at a given speed, then factors such as the weight of the bike and rider, the energy lost to heat through friction and the angle and surface of the road come into play.
Do you remember Miguel Indurain and Lance Armstong riding in the Tour de France? Big Mig growling along like a V8 and Armstrong spinning like a Wankle rotary engine. They say each rider has an ideal cadence and you should use your gears to keep your rhythm steady over different terrain. But I'm not so sure about this. Years ago I was riding with my mountain biking mentor on a long climb into the Port Hills behind Christchurch. He pulled up beside me and said. "How are you going?... If you're getting a bit tired change up." "WHAT?"... "Change Up. Get out of the seat and honk for a bit. Give your legs a rest."
He was right. Bigger gear, slower cadence, different position, till I got tired of that, and then I could change back down and keep going without loosing speed. One of the cool things about riding a single speed bicycle is that you get a more varied work out over a range of resistances. From spinning quickly down hill to standing up and even using your back and arms to climb steeply. Fun and fitness over speed and efficiency.
But I did want to go fast.
I wanted to go as fast as I could and then get back up hill. That's where the idea of a 2-geared dingle bicycle fits in, and the questions deciding my dingle gearing set up were: How high can I practically run my high gear, and how low do I need to make my low gear to make the climb home?
When my big green jellybean bike came out of the box, it had 700C wheels with 700x25 tyres, 165mm cranks, a 44T chain ring and 18T rear cog. sheldon says that's a "gain ratio" of 5.1. Whatever that exactly means, I could climb from my house up the steep last pitch to the top of the neighbourhood hill. After a couple of weeks I could do it pretty easily.
Time to go to A BIGGER GEAR.
Let's start at the rear wheel.

It's got a flip flop hub.
One side has ISO 1.375" x 24 tpi thread, and is fitted with a 18T freewheel. The other side has, a section of 1.375" x 24 tpi threaded hub and a small section of left handed 1.29" x 24tpi thread, with a 18T fixed sprocket and a left handed lock ring.
The smallest freewheel that will fit on a 1.375" x 24 tpi hub is 16T. (Some BMX hubs will take a smaller freewheel.)
The 18T pheasant brand freewheel that came with the bike didn't want to go with out a fight. (See freewheel-destructive removal.)

So I took the fixed cog off the other side... you can google "chain whip" for yourself.
I took a punt that a 16T freewheel would fit onto the double threaded side of the hub... and it did. A Shimano SF-MX30 fit at least as nicely as the pheasant on the other side, and had notches for a removal tool.

So I had my first dingle set up. A 1x2 imperfect flipping half-dingle (see my earlier post "the idea of a dingle") with a 44/16 high gear and 44/18 low. The track forks took up the difference in chain length, with a small adjustment to realign the rear brake shoes.
Mostly I just rode the 44/16. Sheldon says that's a gain ration of 5.6. Which meant in practice that I could still get up the big hill, but I was glad when it was over. But still not fast enough down hill.
The 1x2 'Half-Dingle' set up gave me a choice of two different gears, but they weren't very different!
But with anything more than a 2 or 3 tooth difference in the sizes of the two rear sprockets, the change in chain length between the two gears would see the rear wheel slide out the back of the track forks in high gear. The advantage of a 2x2 dingle set up, is that it should be able to give a more useful range of gearing options while keeping the chain length the same in both gears.
The next step was to put a second chain ring on the front of the bike.
The rear wheel gearing was a relatively simple matter with only a few, standardised components that fit together easily. But the chain ring, attached to the cranks, fitted to the bottom bracket, the whole crankset is a different matter. There a number of different ways these parts can go together and even Sheldon Brown can't tell you what will happen if you try to mix and match, although he was trying right up to the end. (This page is a listing of various bicycle crank sets, and the bottom brackets that fit them. Sheldon solicited information from readers to collect this data but that project is on hold until we set up a new mechanism for collecting and posting additional data. This is the information he colected:)
I got a 52T chain ring on eBay with some 170mm cranks. These had the same bolt circle diameter as the crank set on my bike 110mm. I couldn't mount 2 chain rings on the 170mm cranks because the inner ring wound up touching the chainstays, but I could put the 52T ring on the outside of the 160mm cranks and a 44T ring on the inside... and it would just fit.

But this gearing doesn't really work. The trick with a dingle is to keep the chain length the same in both gears. The 52/16 high gear has a total of 68 teeth on both cogs. The 44/18 low gear has 62 teeth. The difference is so much that the rear wheel falls out of the back of the track forks if you try to set it up in the low gear. The only way I could change the gears on this bike was to carry around a second chain. The Un-Chained Dingle! Of course I dropped the joining link in the grass and spent half an hour trying to find it. Which kind of turned me off this set up.
I liked the big 52T chain ring with the 16T rear freewheel. But I couldn't fit a bigger inner chain ring without it rubbing on the chainstays.
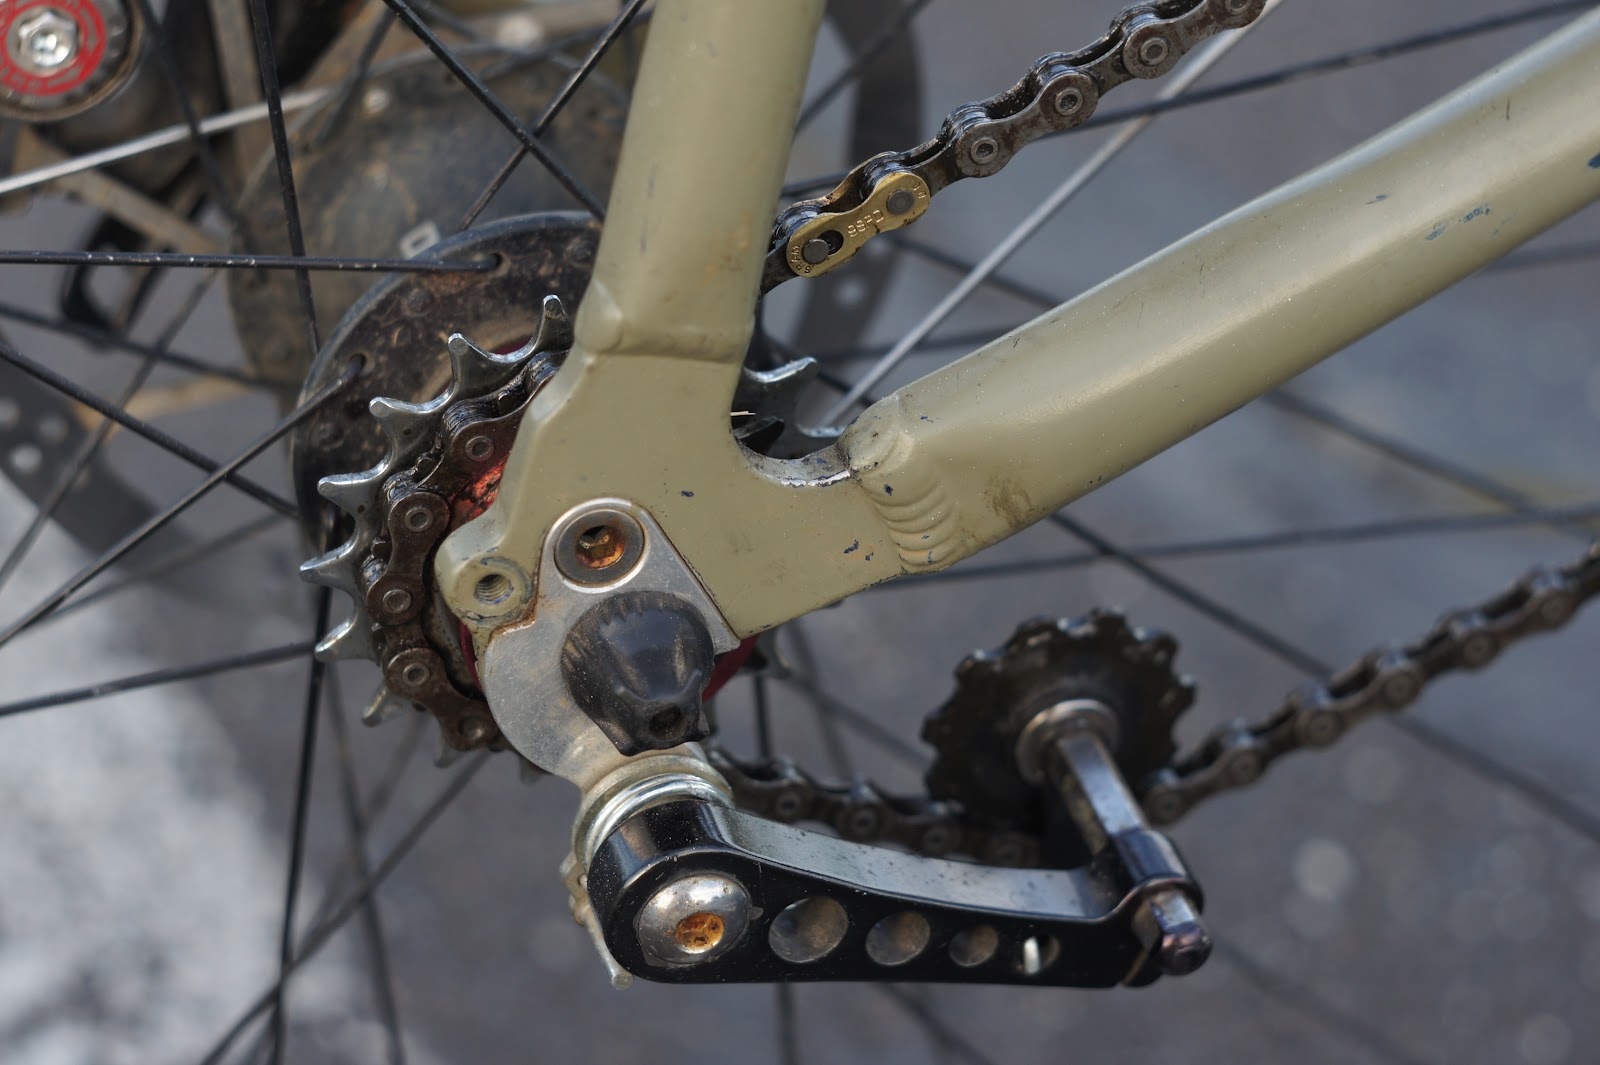
To make more room for a bigger inner chain ring, I needed a new bottom bracket with a longer spindle. I'd never played around with bottom brackets before, but this one was easy. With a screw-in, sealed cartridge bearing, all I needed was a tool that fit, and to be careful not to cross the threads. I put in a new cartridge with a 122mm spindle and a 50T inner chain ring.

This gave me a "perfect" dingle set up. High gear is 52/16 with 68 teeth, low gear is 50/18 with 68 teeth and the rear wheel ends up in exactly the same position in each gear.
Of course 50/18 is not a particularly low gear. (Sheldon says a gain ration of 5.6, the same as the 44/16 set up.) If I wanted a lower, low gear, having decided to go with the 52/16 high gear, the next lower dingle combination with a total of 68 teeth was 49/19. This is where the theory of dingle gearing runs into some practical problems. I don't think anyone actually makes a 49T chain ring with a 110mm BCD, and you might have to search a bit to find a 19T freewheel. I didn't want to go and get parts custom made, so the next usable gear combination is 48/20 which gives sheldon's gain ratio of 4.9, a bit lower than I actually wanted.
If all those numbers are a bit confusing, you should look at this table from acsbmx.com ;-) .


I gently eased off the right crank and spider, hurriedly stripped it's cluster and impulsively mounted a 48T chainwheel!

And there it was, my 52/16 - 48/18 imperfect flipping dingle.
The 52/16 high gear is massive. I fly down hill and shoot across the flat land in an insane blur. The 48/18 lower gear is a sensible alternative. I can ride to work, climb hills and get home from wherever I might end up.
And I got an email today to say my White Industries freewheel was at the shop. Can't wait to get it on.
How many gears does a single speed bicycle have? I say at least two. Sitting and standing.
There is also a difference between Spinning - evenly applying force through the whole pedal cycle, usually with a fast cadence, and Honking - pushing hard on the down stroke and letting your foot come back around with the pedal, usually at a slower cadence.
If you want to think in terms of energetics, how much power is needed to move at a given speed, then factors such as the weight of the bike and rider, the energy lost to heat through friction and the angle and surface of the road come into play.
Do you remember Miguel Indurain and Lance Armstong riding in the Tour de France? Big Mig growling along like a V8 and Armstrong spinning like a Wankle rotary engine. They say each rider has an ideal cadence and you should use your gears to keep your rhythm steady over different terrain. But I'm not so sure about this. Years ago I was riding with my mountain biking mentor on a long climb into the Port Hills behind Christchurch. He pulled up beside me and said. "How are you going?... If you're getting a bit tired change up." "WHAT?"... "Change Up. Get out of the seat and honk for a bit. Give your legs a rest."
He was right. Bigger gear, slower cadence, different position, till I got tired of that, and then I could change back down and keep going without loosing speed. One of the cool things about riding a single speed bicycle is that you get a more varied work out over a range of resistances. From spinning quickly down hill to standing up and even using your back and arms to climb steeply. Fun and fitness over speed and efficiency.
But I did want to go fast.
I wanted to go as fast as I could and then get back up hill. That's where the idea of a 2-geared dingle bicycle fits in, and the questions deciding my dingle gearing set up were: How high can I practically run my high gear, and how low do I need to make my low gear to make the climb home?
When my big green jellybean bike came out of the box, it had 700C wheels with 700x25 tyres, 165mm cranks, a 44T chain ring and 18T rear cog. sheldon says that's a "gain ratio" of 5.1. Whatever that exactly means, I could climb from my house up the steep last pitch to the top of the neighbourhood hill. After a couple of weeks I could do it pretty easily.
Time to go to A BIGGER GEAR.
Let's start at the rear wheel.

One side has ISO 1.375" x 24 tpi thread, and is fitted with a 18T freewheel. The other side has, a section of 1.375" x 24 tpi threaded hub and a small section of left handed 1.29" x 24tpi thread, with a 18T fixed sprocket and a left handed lock ring.
The smallest freewheel that will fit on a 1.375" x 24 tpi hub is 16T. (Some BMX hubs will take a smaller freewheel.)
The 18T pheasant brand freewheel that came with the bike didn't want to go with out a fight. (See freewheel-destructive removal.)

So I took the fixed cog off the other side... you can google "chain whip" for yourself.
I took a punt that a 16T freewheel would fit onto the double threaded side of the hub... and it did. A Shimano SF-MX30 fit at least as nicely as the pheasant on the other side, and had notches for a removal tool.
So I had my first dingle set up. A 1x2 imperfect flipping half-dingle (see my earlier post "the idea of a dingle") with a 44/16 high gear and 44/18 low. The track forks took up the difference in chain length, with a small adjustment to realign the rear brake shoes.
Mostly I just rode the 44/16. Sheldon says that's a gain ration of 5.6. Which meant in practice that I could still get up the big hill, but I was glad when it was over. But still not fast enough down hill.
The 1x2 'Half-Dingle' set up gave me a choice of two different gears, but they weren't very different!
But with anything more than a 2 or 3 tooth difference in the sizes of the two rear sprockets, the change in chain length between the two gears would see the rear wheel slide out the back of the track forks in high gear. The advantage of a 2x2 dingle set up, is that it should be able to give a more useful range of gearing options while keeping the chain length the same in both gears.
The next step was to put a second chain ring on the front of the bike.
The rear wheel gearing was a relatively simple matter with only a few, standardised components that fit together easily. But the chain ring, attached to the cranks, fitted to the bottom bracket, the whole crankset is a different matter. There a number of different ways these parts can go together and even Sheldon Brown can't tell you what will happen if you try to mix and match, although he was trying right up to the end. (This page is a listing of various bicycle crank sets, and the bottom brackets that fit them. Sheldon solicited information from readers to collect this data but that project is on hold until we set up a new mechanism for collecting and posting additional data. This is the information he colected:)
I got a 52T chain ring on eBay with some 170mm cranks. These had the same bolt circle diameter as the crank set on my bike 110mm. I couldn't mount 2 chain rings on the 170mm cranks because the inner ring wound up touching the chainstays, but I could put the 52T ring on the outside of the 160mm cranks and a 44T ring on the inside... and it would just fit.

But this gearing doesn't really work. The trick with a dingle is to keep the chain length the same in both gears. The 52/16 high gear has a total of 68 teeth on both cogs. The 44/18 low gear has 62 teeth. The difference is so much that the rear wheel falls out of the back of the track forks if you try to set it up in the low gear. The only way I could change the gears on this bike was to carry around a second chain. The Un-Chained Dingle! Of course I dropped the joining link in the grass and spent half an hour trying to find it. Which kind of turned me off this set up.
I liked the big 52T chain ring with the 16T rear freewheel. But I couldn't fit a bigger inner chain ring without it rubbing on the chainstays.
To make more room for a bigger inner chain ring, I needed a new bottom bracket with a longer spindle. I'd never played around with bottom brackets before, but this one was easy. With a screw-in, sealed cartridge bearing, all I needed was a tool that fit, and to be careful not to cross the threads. I put in a new cartridge with a 122mm spindle and a 50T inner chain ring.

This gave me a "perfect" dingle set up. High gear is 52/16 with 68 teeth, low gear is 50/18 with 68 teeth and the rear wheel ends up in exactly the same position in each gear.
Of course 50/18 is not a particularly low gear. (Sheldon says a gain ration of 5.6, the same as the 44/16 set up.) If I wanted a lower, low gear, having decided to go with the 52/16 high gear, the next lower dingle combination with a total of 68 teeth was 49/19. This is where the theory of dingle gearing runs into some practical problems. I don't think anyone actually makes a 49T chain ring with a 110mm BCD, and you might have to search a bit to find a 19T freewheel. I didn't want to go and get parts custom made, so the next usable gear combination is 48/20 which gives sheldon's gain ratio of 4.9, a bit lower than I actually wanted.
If all those numbers are a bit confusing, you should look at this table from acsbmx.com ;-) .

And besides...
I've been talking about a 'flip flop dingle', with a separate freewheel on each side of the hub. Turning the rear wheel around to change gear is not really too difficult, but it would be more convenient to have both rear cogs on the same side of the wheel. This introduces more practical difficulties.
Surly make a "Dingle Cog" in sizes 17/19, 17/20 and 17/21, but only as a fixed cog, and I wanted a freewheel. I found this ACS CLAWS 2 speed freewheel on line,

but it wasn't on the acsbmx website, which makes me wonder if they've stopped making them, and the shop couldn't give me the 16/17 size, only the 15/16 which fits a smaller threaded hub than mine. It's probably possible to customise a freehub cassette, but I wasn't sure how to do it and I didn't really want to go to a whole new wheel. So that really only left one option, a white industries DOS ENO.

Most freewheels are semi-disposable items, engineered to fairly low specs and intended to be replaced as soon as they give any trouble. You can get a cheap one for under $20. But this beautiful piece of machinery, made in the USA, is finely machined, with a serviceable sealed bearing system. Even if it costs 5 or 6 times as much... that's not really a lot of money ... I convinced myself. So I asked the guys at gear brisbane to get me one. It comes in two sizes 17/19 and 16/18, but no 20T option, so it made sense to find a set up for my low gear using the 18T rear cog.
An imperfect dingle set up, where the two gears have slightly different chain lengths and changing gears means the rear wheel moves slightly forward or back in the track forks to compensate.
Sheldon Brown's 'tool tip' on cotterless crank removal makes the process sound almost erotic. As he says, the crank puller is "a joy to use"
Oddly similar to my other favourite tool the tap re-seater.
And there it was, my 52/16 - 48/18 imperfect flipping dingle.
The 52/16 high gear is massive. I fly down hill and shoot across the flat land in an insane blur. The 48/18 lower gear is a sensible alternative. I can ride to work, climb hills and get home from wherever I might end up.
And I got an email today to say my White Industries freewheel was at the shop. Can't wait to get it on.
Saturday, 11 February 2012
The Idea of a Dingle
When I started riding my single speed to work and around the neighbourhood I'd often get the same reaction from people.
"Nice bike..." they'd say. (It's fluorescent green, with red tyres, gold hubs, and one black and one blue rim.)
Then... "How do you go up hills?"
If I was feeling cheeky I'd just slap my bulging thighs and say "No worries at all!"
For a more serious answer I'd point out that you can set up your single speed in any gear you like, you can set the gearing as low as you need for the hills you want to climb. In fact I was finding that it was going down hill, and even on the flats, that I was wishing I had another gear to change up to. Riding down the hill from my house I was "spinning out", unable to turn my pedals any faster to push the bike along, and even on the long flat run along the river I was coasting when I could have been pushing. And any time some lycra clad hard-man sitting on thousands of dollars worth of road bike went past me I was itching for a bigger gear to give them a run.
Of course at some point I was going to have to ride back up hill to get home.
It was while I was looking on the internet for parts to change the gearing on my single speed that I found THE IDEA OF A DINGLE.
I think this is the website where I first found the idea explained nippleworks.blogspot.com.au.

That's my idea of a dingle, but there are probably some less ...ummm... idiosyncratic reasons for a two-geared, single speed set up.
USES FOR A DINGLE
Climb / Descent - The obvious reason. Lower gear for uphill bigger gear for down.
Head wind / Tail wind - Regular riding with a strong prevailing wind. Use different gears for your outward and return journey.
On road / Off road - Ride the big gear on the bitumen till you get to the trailhead, then change down to head off into the dirt.
Race / Bail - Some days you want to push it all the way. Some days you just want to take it easy. One bike, two personalities.
Out with the boys / Out with the family - Big gear for the big egos, little gear for the little tykes. (Am I starting to stretch the idea a bit too far?)
Step down resistance training - Exercise to exhaustion against a high load, then have a brief rest and go again with lighter weights.... I don't know why, ask an exercise physiologist.
Any way that's some food for thought. Here's some eye candy.


There are more pictures of this gorgeous machine at cycleexif.com and on its' builder's website fastboycycles.com. It's got a two-speed freewheel on one side and double fixed sprocket on the other. Look at that chain ring! I'm pretty sure it's two cogs made in one piece! That's got to be a special custom job. You can read the brand in one of the pics I haven't posted, it says White Industries U.S.A.
That's the general idea of a dingle. There are a few details to think about and different ways to actually make it work, so here is my...
Dingle Taxonomy (different types of dingle)
Perfect dingle - The two different gears available on a dingle, depend on the ratios of the sizes of the front and rear cogs used in each set up. The big front cog with the small rear cog gives a higher gear than the small front cog with the large rear cog. If each pair of cogs used has the same total number of teeth, then the chain length for each combination will be exactly the same. For example 36T at the front with 14T at the back uses the same chain length as 34T front with 18T rear. (This might not be exactly true if you used a front cog so large that the chain was in contact with more than half the diameter of the cog, but that's not really going to happen in any practical situation.) Keeping the chain length the same for both gears means that when you change gear the rear wheel ends up in the same place and bike's geometry is unchanged. This is how the dingle can work without derailleurs.
Imperfect dingle - Sometimes keeping the total number of teeth on the front and rear cogs exactly the same in both dingle gear combinations can be inconvenient and limits the choice of gears you can use. But if the total tooth numbers are different in the two gears the length of chain needed to drive them will be different. If you want to use the same chain for both gears you'll need some way to take up the slack in the long gear. Both the bikes in the pictures above have track forks not drop outs, so the rear wheel can slide backwards and forwards up to a couple of centimeters to do this. Depending on the set up you may need to adjust the rear brakes when you switch gears.
Tensioned dingle - This bike uses a chain tensioner such as a singleator or a melvin. This is one way of adjusting the chain length for an imperfect dingle. It also lets you use vertical drop outs and disc brakes. You can probably change the gears without having to loosen off the rear wheel too. What's the down side? Extra parts.... and the look!


These pics come from biketinker.com.
Unchained dingle - One day I went out with a dingle set up so far from perfect that I needed to switch chains when I switched gears. I stopped in the park at the bottom of the hill, turned the bike upside down, took off the chain and promptly lost the connecting link in the grass. Half an hour of searching before I could find it and start home. NOT RECOMMENDED.
Half dingle (or Single dingle) - Two rear cogs and one front chain ring, or one rear cog and two chain rings. What do you call that?
Flipping dingle - The rear wheel has a different sized drive cog on each side. You change gear by flipping the rear wheel around. Apparently this was state of the art racing technology in the 1920s.
Right-handed dingle - Two cogs on the same side of the drive wheel. You don't have to take the rear wheel off to change gears, but you may be limited in the choice of rear cog combinations. I could only find 3 ready made 2 speed cogs on the market. The surly dingle cog comes as a 17/19 17/20 or 17/21, but only as a fixed cog. ACS make a 2 speed freewheel, but I could only find a 15/16 that fits the smaller side of of a BMX flip flop hub. And the White industries DOS freewheel comes as 16/18 or 17/19 ... and costs about $130! You can probably customise a multi speed cassette to get a wider choice of gears. I don't know how.
Left-handed dingle - Apparently you can make a bike with the drive train on the left. Can you make a leftie dingle? I don't know.
I still don't know some things about dingles, but I reckon I know enough to build my big green single speed into single purpose downhill / up hill trainer for my home circuit.
"Nice bike..." they'd say. (It's fluorescent green, with red tyres, gold hubs, and one black and one blue rim.)
Then... "How do you go up hills?"
If I was feeling cheeky I'd just slap my bulging thighs and say "No worries at all!"
For a more serious answer I'd point out that you can set up your single speed in any gear you like, you can set the gearing as low as you need for the hills you want to climb. In fact I was finding that it was going down hill, and even on the flats, that I was wishing I had another gear to change up to. Riding down the hill from my house I was "spinning out", unable to turn my pedals any faster to push the bike along, and even on the long flat run along the river I was coasting when I could have been pushing. And any time some lycra clad hard-man sitting on thousands of dollars worth of road bike went past me I was itching for a bigger gear to give them a run.
Of course at some point I was going to have to ride back up hill to get home.
It was while I was looking on the internet for parts to change the gearing on my single speed that I found THE IDEA OF A DINGLE.
I think this is the website where I first found the idea explained nippleworks.blogspot.com.au.
A Dingle is a dual configuration, single speed bicycle. Generally with two chain rings up the front and two sprockets at the back. Without derailleurs, it gives the lightweight, straight chain line, mechanical simplicity of a single speed, or fixed gear bike, with the option of two different gear combinations. Using the bigger chain ring with the smaller sprocket for a high gear, or the smaller chain ring with the bigger sprocket for a lower gear, they're usually set up so that the chain length is about the same for both gears.
Of course you can't change gears on-the-fly. It takes a couple of minutes and maybe a spanner, so the dingle is not suited to continuos riding over mixed terrain, but it may be just the thing if you want to use one bike for two distinct types of riding.
My idea was to start out in as high a gear as I could possibly manage, head out from my house down the hill, mixing it with stream of grim faced riders who use my street as part of their oh-so-serious training circuit, ride hard and fast along the flat track beside the river until my legs hurt, or the joke had worn thin, then stop for a rest, move the chain onto the lower gear and cruise back up the hill for a cup of tea and a lie down.
That's my idea of a dingle, but there are probably some less ...ummm... idiosyncratic reasons for a two-geared, single speed set up.
USES FOR A DINGLE
Climb / Descent - The obvious reason. Lower gear for uphill bigger gear for down.
Head wind / Tail wind - Regular riding with a strong prevailing wind. Use different gears for your outward and return journey.
On road / Off road - Ride the big gear on the bitumen till you get to the trailhead, then change down to head off into the dirt.
Race / Bail - Some days you want to push it all the way. Some days you just want to take it easy. One bike, two personalities.
Out with the boys / Out with the family - Big gear for the big egos, little gear for the little tykes. (Am I starting to stretch the idea a bit too far?)
Step down resistance training - Exercise to exhaustion against a high load, then have a brief rest and go again with lighter weights.... I don't know why, ask an exercise physiologist.
Any way that's some food for thought. Here's some eye candy.


There are more pictures of this gorgeous machine at cycleexif.com and on its' builder's website fastboycycles.com. It's got a two-speed freewheel on one side and double fixed sprocket on the other. Look at that chain ring! I'm pretty sure it's two cogs made in one piece! That's got to be a special custom job. You can read the brand in one of the pics I haven't posted, it says White Industries U.S.A.
That's the general idea of a dingle. There are a few details to think about and different ways to actually make it work, so here is my...
Dingle Taxonomy (different types of dingle)
Perfect dingle - The two different gears available on a dingle, depend on the ratios of the sizes of the front and rear cogs used in each set up. The big front cog with the small rear cog gives a higher gear than the small front cog with the large rear cog. If each pair of cogs used has the same total number of teeth, then the chain length for each combination will be exactly the same. For example 36T at the front with 14T at the back uses the same chain length as 34T front with 18T rear. (This might not be exactly true if you used a front cog so large that the chain was in contact with more than half the diameter of the cog, but that's not really going to happen in any practical situation.) Keeping the chain length the same for both gears means that when you change gear the rear wheel ends up in the same place and bike's geometry is unchanged. This is how the dingle can work without derailleurs.
Imperfect dingle - Sometimes keeping the total number of teeth on the front and rear cogs exactly the same in both dingle gear combinations can be inconvenient and limits the choice of gears you can use. But if the total tooth numbers are different in the two gears the length of chain needed to drive them will be different. If you want to use the same chain for both gears you'll need some way to take up the slack in the long gear. Both the bikes in the pictures above have track forks not drop outs, so the rear wheel can slide backwards and forwards up to a couple of centimeters to do this. Depending on the set up you may need to adjust the rear brakes when you switch gears.
Tensioned dingle - This bike uses a chain tensioner such as a singleator or a melvin. This is one way of adjusting the chain length for an imperfect dingle. It also lets you use vertical drop outs and disc brakes. You can probably change the gears without having to loosen off the rear wheel too. What's the down side? Extra parts.... and the look!

These pics come from biketinker.com.
Unchained dingle - One day I went out with a dingle set up so far from perfect that I needed to switch chains when I switched gears. I stopped in the park at the bottom of the hill, turned the bike upside down, took off the chain and promptly lost the connecting link in the grass. Half an hour of searching before I could find it and start home. NOT RECOMMENDED.
Half dingle (or Single dingle) - Two rear cogs and one front chain ring, or one rear cog and two chain rings. What do you call that?
Flipping dingle - The rear wheel has a different sized drive cog on each side. You change gear by flipping the rear wheel around. Apparently this was state of the art racing technology in the 1920s.
Right-handed dingle - Two cogs on the same side of the drive wheel. You don't have to take the rear wheel off to change gears, but you may be limited in the choice of rear cog combinations. I could only find 3 ready made 2 speed cogs on the market. The surly dingle cog comes as a 17/19 17/20 or 17/21, but only as a fixed cog. ACS make a 2 speed freewheel, but I could only find a 15/16 that fits the smaller side of of a BMX flip flop hub. And the White industries DOS freewheel comes as 16/18 or 17/19 ... and costs about $130! You can probably customise a multi speed cassette to get a wider choice of gears. I don't know how.
Left-handed dingle - Apparently you can make a bike with the drive train on the left. Can you make a leftie dingle? I don't know.
I still don't know some things about dingles, but I reckon I know enough to build my big green single speed into single purpose downhill / up hill trainer for my home circuit.
Sunday, 18 December 2011
Freewheelin' Sheldon Brown
It's got a flip flop hub... that's a rear hub with a thread on both sides so you can mount a cog on each side and change between two gears by "flipping" the rear wheel. It came from the shop with a freewheel on one side and a fixed cog on the other.
To start, I just rode it how it came out of the box, set up to freewheel, and apart from some bar ends and toeclips, I didn't really do much to it. Then after a while the chain started to sag a bit and the cranks creaked a bit and everything needed a bit of a tightening.
 So I thought: "Since I'm loosening off the back wheel, I'll try turning it around and riding with a fixed wheel".... I was almost hooked. It felt really good riding up hill, smooth and connected to the road. It was wierdly interesting riding slowly and stopping, like I had more control but more potential for disaster. I was definitely getting a good work out and my legs hurt in new and unusual ways. But it was wrong for going down hill. The strange feeling of walking down giant stairs trying to keep in control, I wasn't game to build up any speed in case some kid or car came out in front of me and I couldn't stop in a hurry... Some people ride without brakes!!? Mostly it was too slow. As soon as I started down hill I was beeing overtaken by grannies on hybrids and everyone else. And when I flicked a stick up off the road that got in my spokes and I thought about the dangers of anything catching in a fixed drive train, I realised that the freewheel is actually a safety device... part of what was originally mean by a safety bicycle?
If I was twenty years younger and not so worried about loosing skin and breaking wrists, I might have stuck with the fixed gear and learnt to go fast and do track stands and ride backwards. If I lived in Melbourne or New York or some other place with no hills I might have given it a bit more of a go but I think there are reasons why there seem to be very few people riding fixies around Brisbane. So I went back to the freewheel.
Now I was just a little bit too old when the BMX craze hit. My first bike was some sort of kids cruiser made by Repco. It was red and I don't remember much more about it. I'm pretty sure it hand "back pedal brakes". My next bike was a "Ten speed racer"! White Toyosha frame (made by the Toyota auto company) with shifters on the down tube. I rode that through high school, got a car and after a while got into mountain bikes. So I'd never really looked at a screw-on freewheel before my wife bought me my on-line single speed.
It didn't take much searching before I found Sheldon Brown and now I know everything.

The street where I live
I live on a hill in Brisbane. Hundreds of cyclists ride past my door each week. Most of them have climbed up the hill from the cycle bridge that crosses the river to the university. They reach the highest point in their ride just before they get to my place, then start down the first steep pitch of the descent to the track along the river.
In the early morning and on weekends, packs of lycra clads on expensive road bikes roll past shouting, then they thin out to give way to commuters with back packs or panniers followed by the daily neighbourhood comings and goings, on old mountain bikes, cruisers and bmx, a few now heading the other way, up the hill.
And that's where I rolled out my new green single speed. Down the Terrace and over Boundary street on the bridge, straight ahead at the bottom and into the left turn on Hoogley, then through the round abouts and on to the long flat track around the river, as far as the crowds at Southbank or the wharfs at Kangaroo Point if you like. Then again, a little bit faster this time..... Down the Terrace spinning as fast as I can till I can't keep up, tuck and roll, spin, through and into the dropping left hander, start wide, try not to touch the brakes. Almost straight, through the small round about, then the big round about at the bottom of the hill with the busses and the reverse camber....watch out.... and on round the river as far as I like till I turn around and head back up the hill. And again a bit faster.
Now I'm not competitive. I'm out riding for fun and exercise. I'm only looking for the fastest line down the hill to keep my mind ocupied....But when I pull out for my ride and see two skinny guys in lycra appearing at the top of the hill behind me, I hit it as hard as I can. Out of the seat, pumping up to speed then spinning like mad hardly coasting till I get to Ganges street. I quickly look behind me as I pull out to line up the left hander. And the guy behind pulls around me just as we exit the corner. I look at him. He looks at me. He turns over his pedals and starts to pull ahead. Mine won't engage at this speed. "Dam!" I call Out at Him "I need a bigger gear!"
I caught him again when he slowed at the big round about and there's a little hill, before he pulled away again on the flat along the river. Spinning as fast as I could, smooth and fast, he still pulls away, then his mate passed me as well and I had to give in. I need a bigger gear!
Subscribe to:
Comments (Atom)